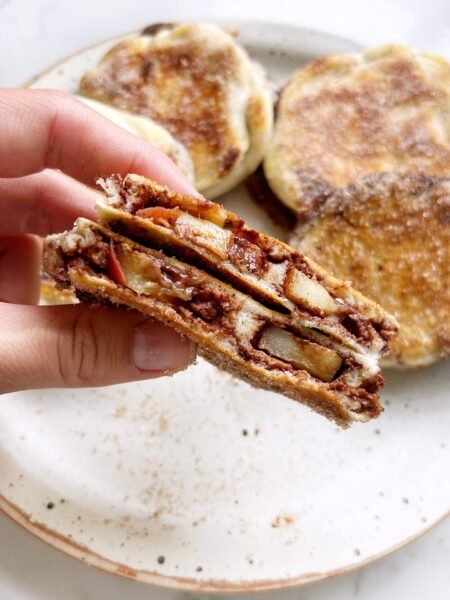

If you’ve ever been told to avoid gluten, you’ll know the moment of panic that follows: what about bread? When I first started experimenting with gluten-free options, I wanted something simple, satisfying, and made from real ingredients. This chickpea bread quickly became a staple in my kitchen.
As a nutrition coach, I love recipes that tick multiple boxes: balanced macros, minimal ingredients, and easy prep. This gluten free chickpea bread is naturally high in protein and fibre thanks to chickpeas and egg, which means it keeps you fuller for longer and supports stable energy levels. It’s also an easy bread recipe in microwave form, perfect for busy days when you want something warm and homemade without turning on the oven.
Whether you use it for sandwiches or toast it for extra texture, this chickpea bread recipe is one you’ll come back to again and again.
Ingredients
For the Chickpea Bread
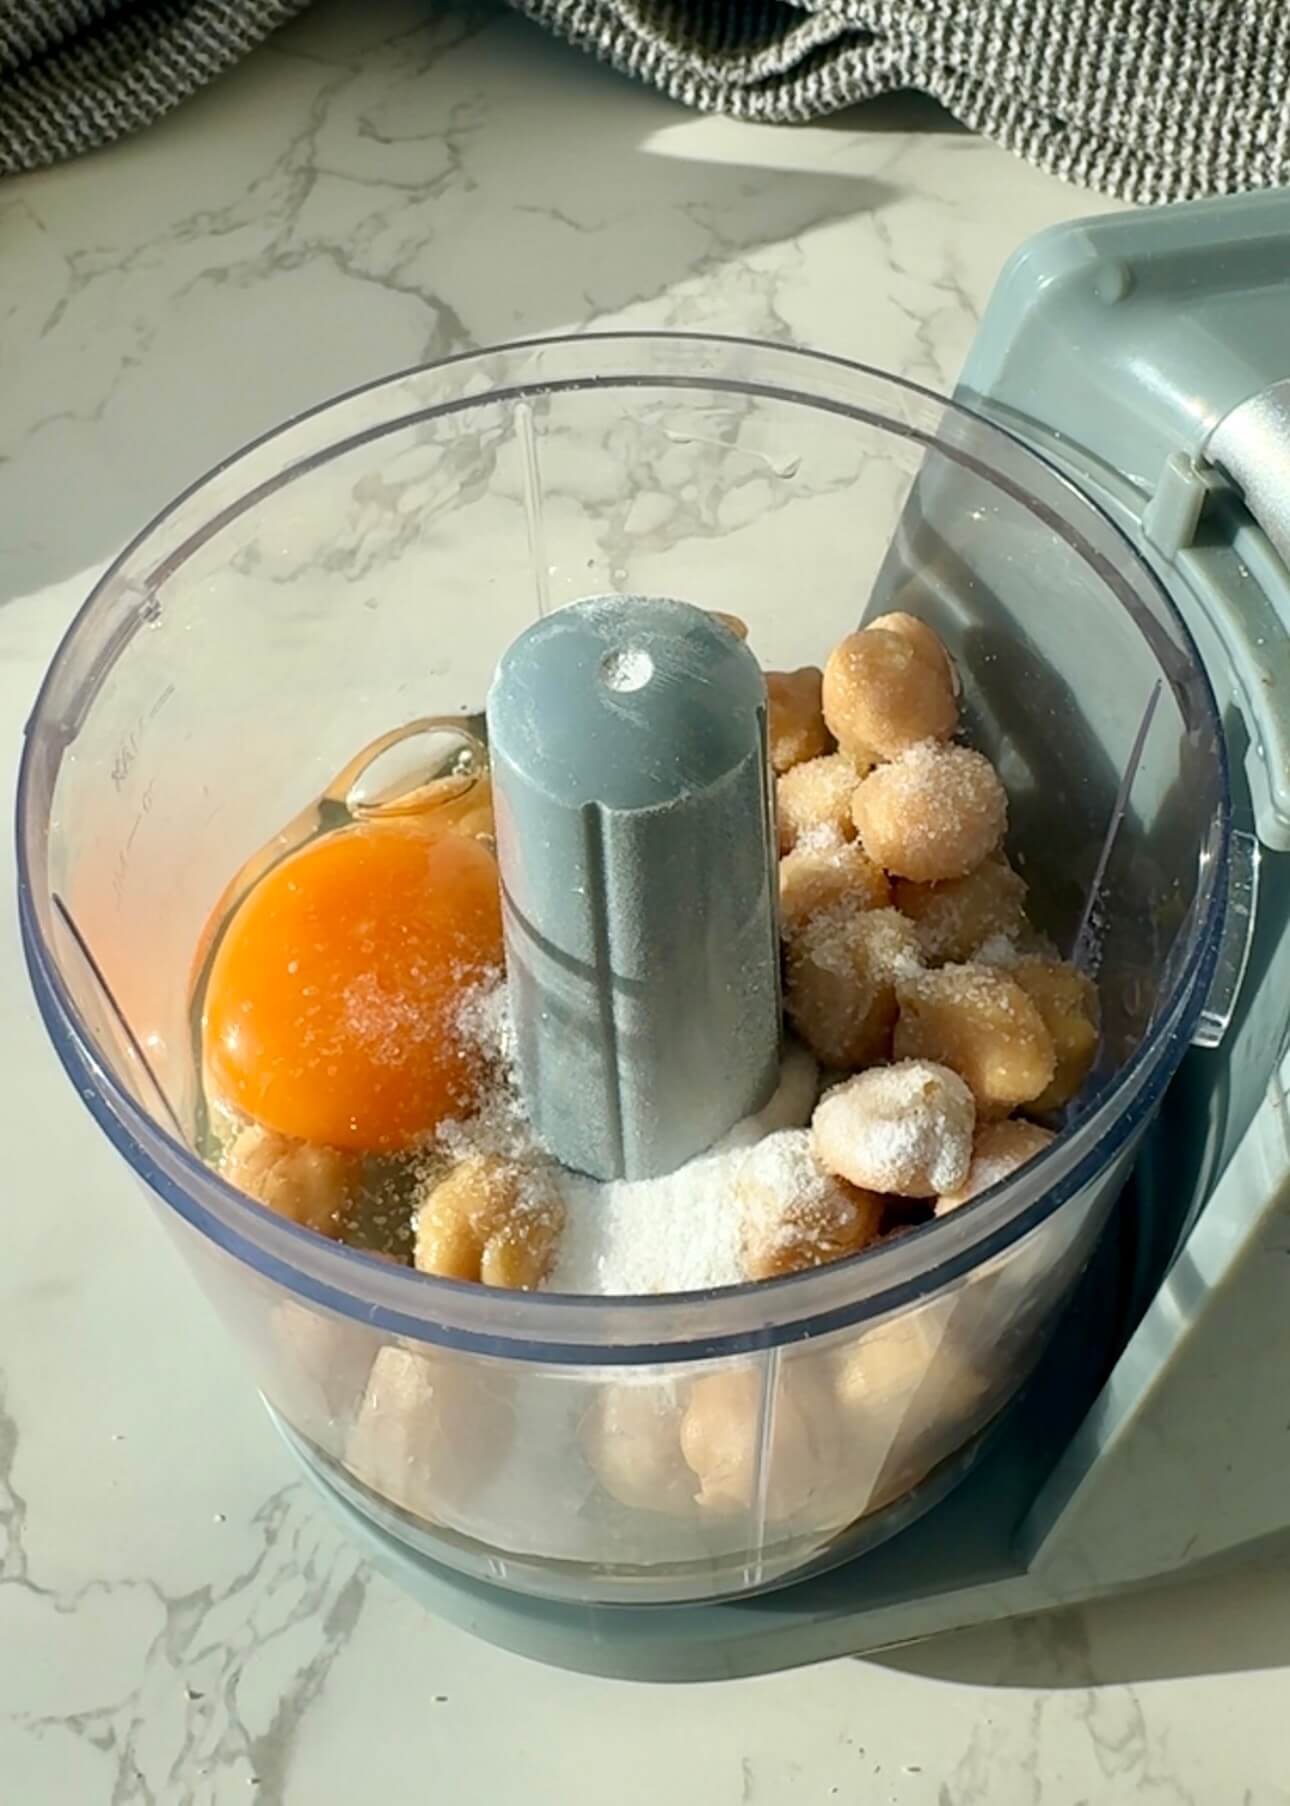
- 70 g canned chickpeas, drained
- 1 whole egg
- 1 tsp olive oil
- ½ tsp baking powder
- Pinch of salt
Substitutions
- Chickpeas: You can use the equivalent amount of cooked dried chickpeas. Rinse well to reduce sodium if using canned.
- Egg: Not recommended to swap in this version, as it provides structure and protein.
- Olive oil: Avocado oil or melted butter both work.
- Baking powder: Essential for lift. Make sure it’s fresh.
If you prefer, you can also turn this into a chickpea flour bread by replacing the whole chickpeas with approximately 60 g chickpea flour plus 60–70 ml water, blended until smooth.
Step-by-Step Method
1. Blend the batter
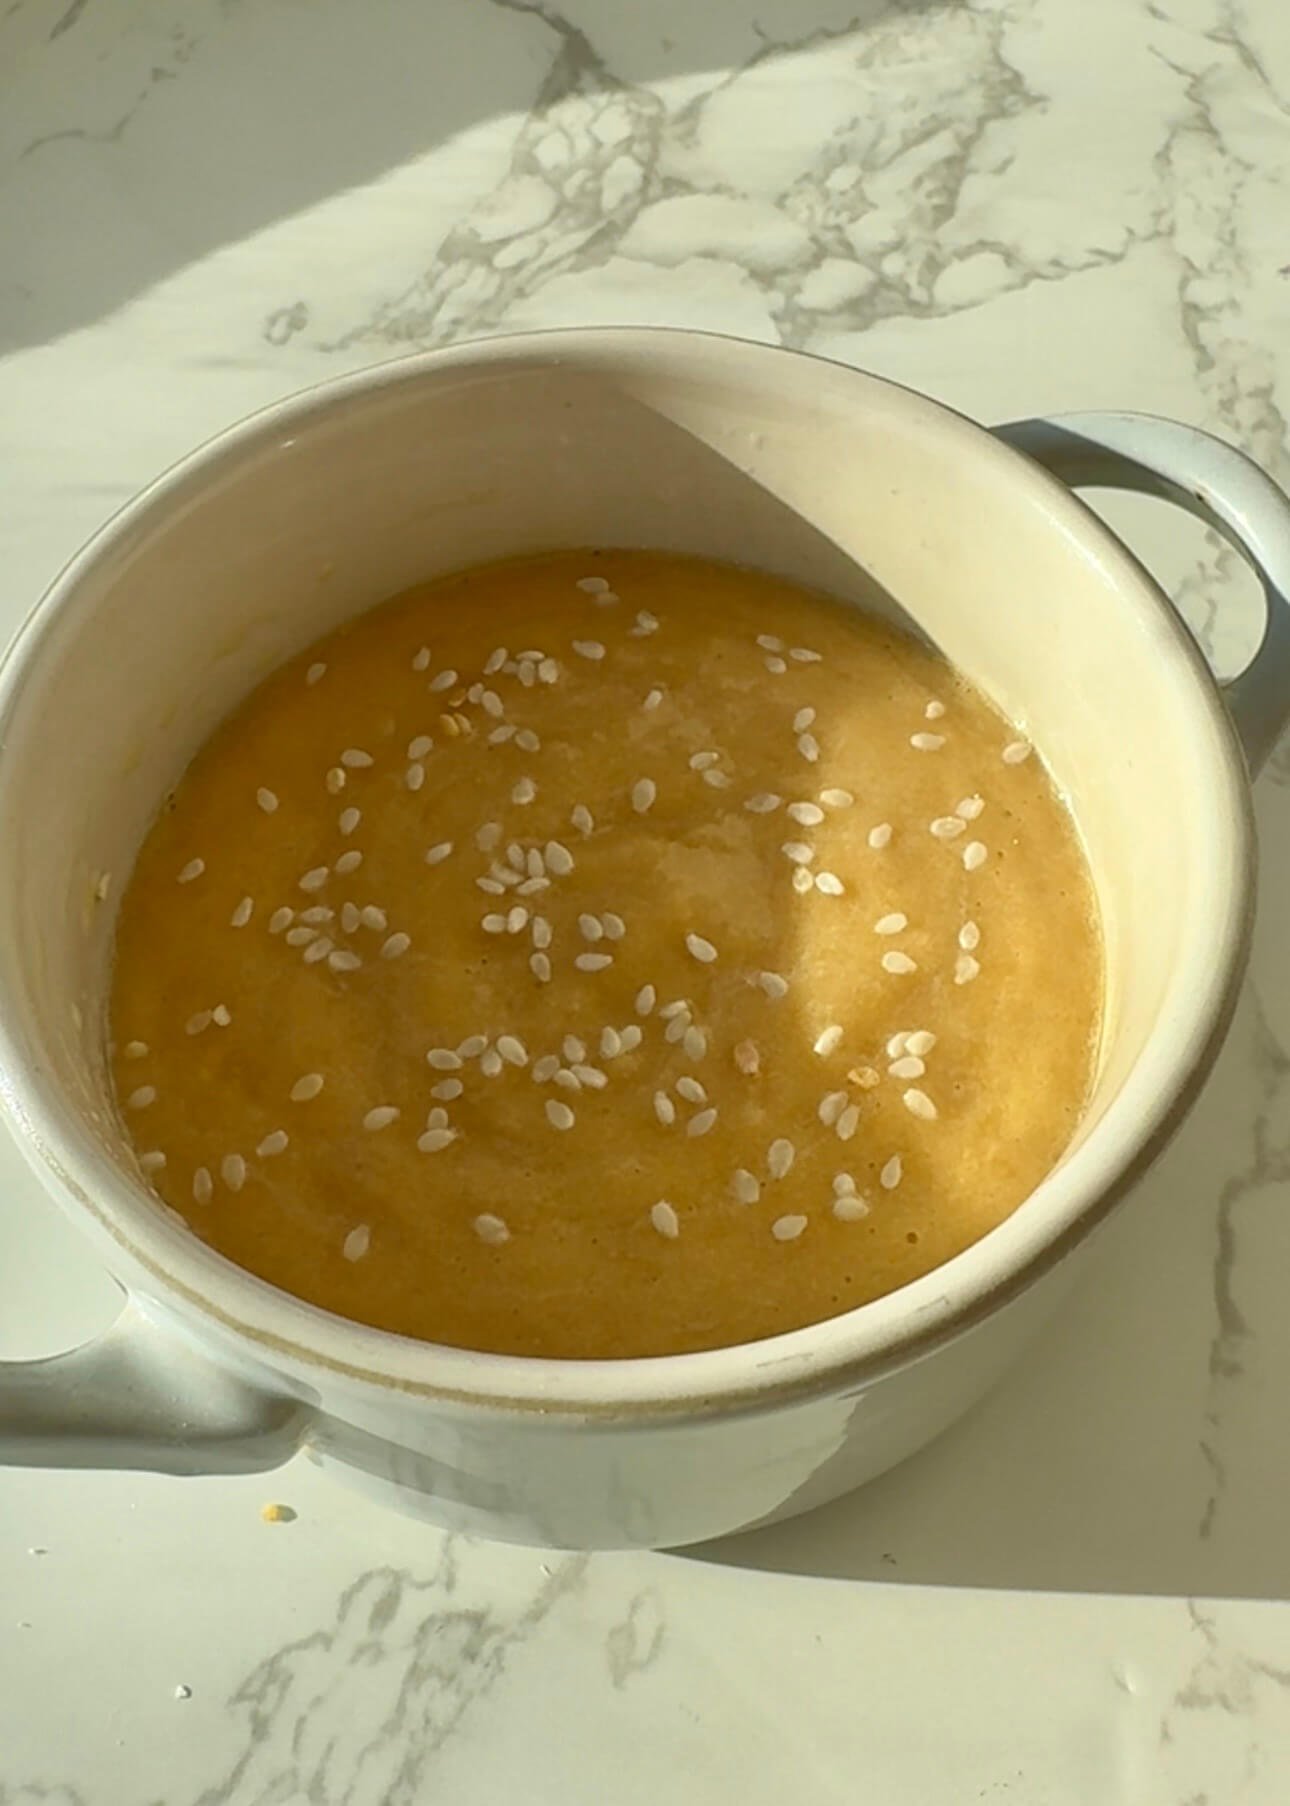
Add chickpeas, egg, olive oil, baking powder, and salt to a blender or bowl. Blend until completely smooth.
Coach tip: Blend thoroughly to avoid a grainy texture. A smooth batter gives you a softer crumb and better rise.
2. Prepare your dish
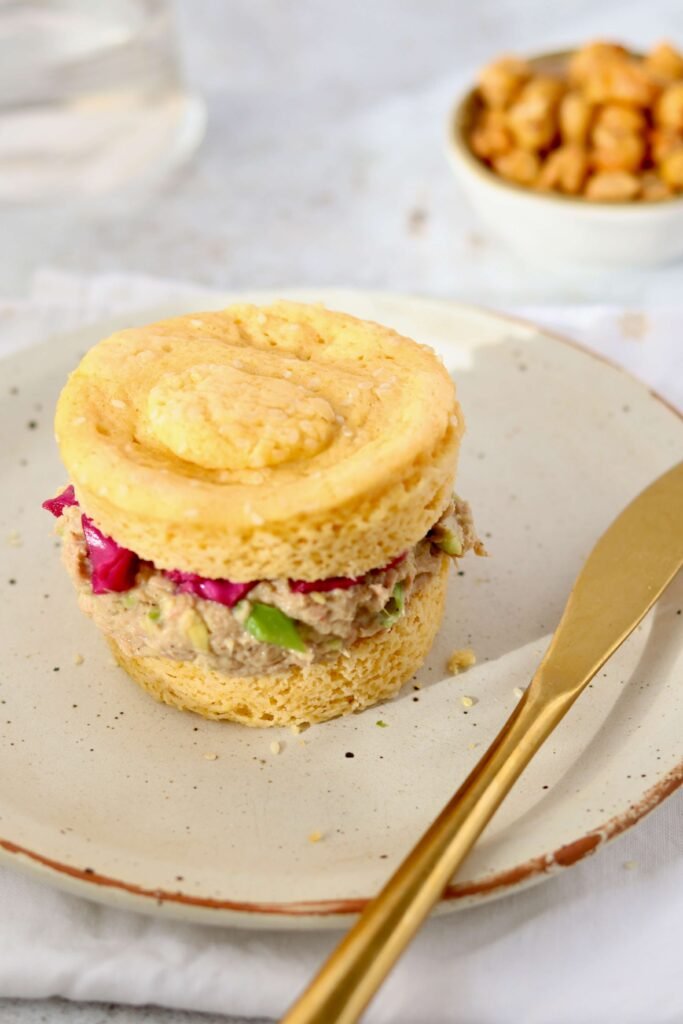
Pour the batter into a small microwave-safe bowl, ramekin, or mug. Smooth the top.
Coach tip: Use a wider ramekin if you want a flatter, sandwich-style shape.
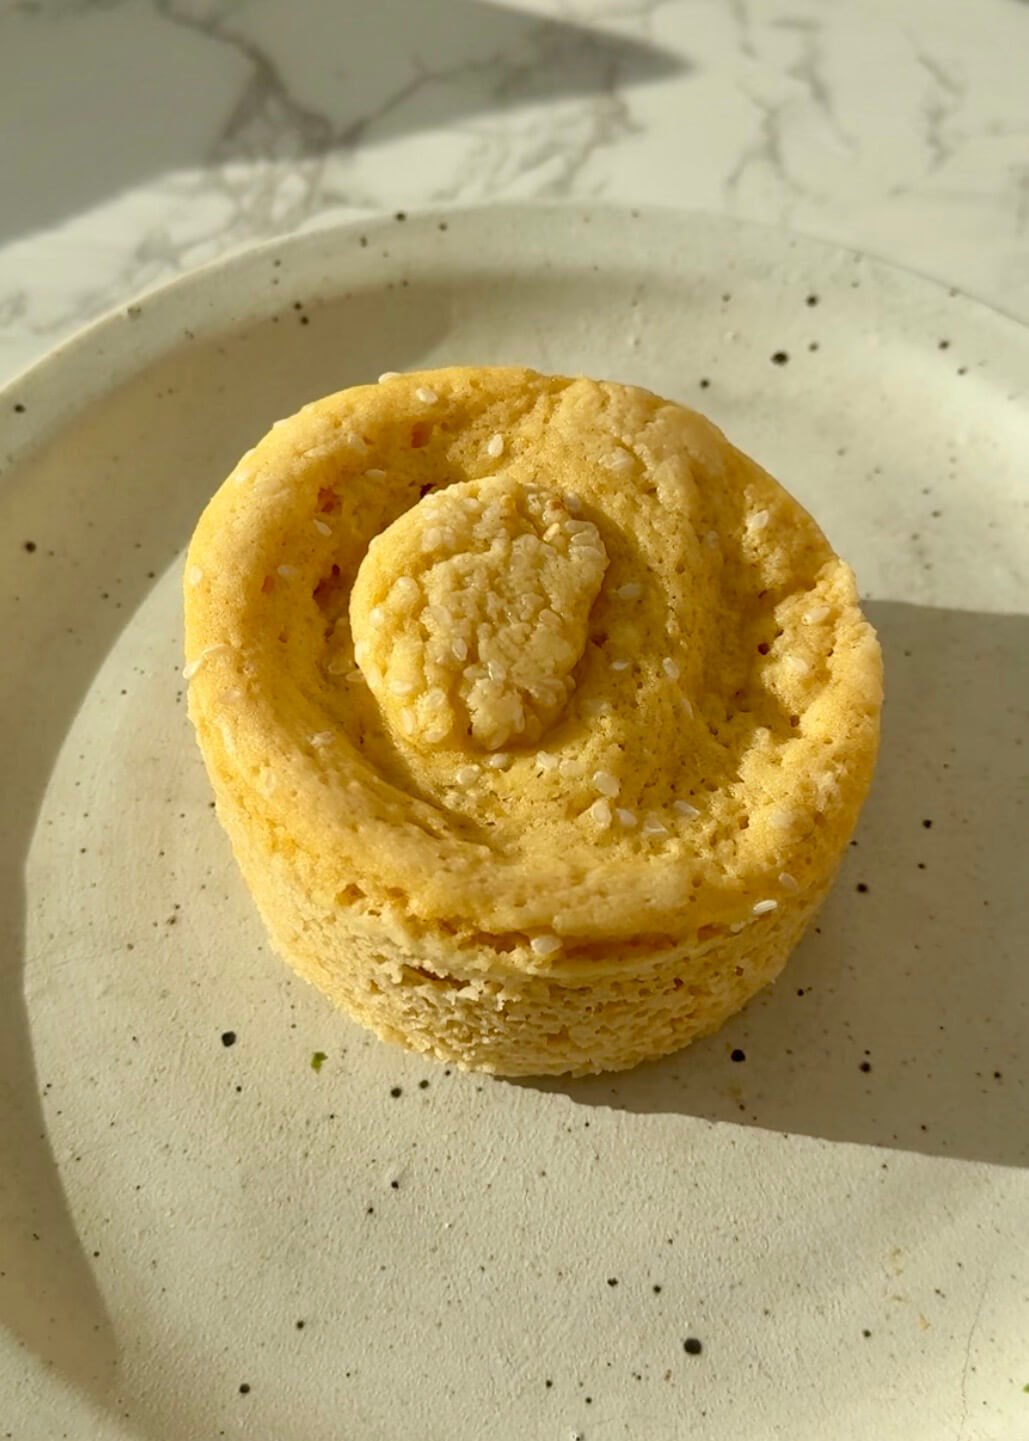
3. Microwave method
Microwave on high for 3 minutes, cooking in 1-minute intervals and checking each time. The bread should feel firm to the touch and pull slightly away from the edges.
Coach tip: Overcooking can make it rubbery. Stop as soon as it’s set in the center.
This is one of those microwave bread recipes that genuinely works when you need speed.
4. Oven method (alternative)
Preheat oven to 180°C / 350°F. Bake for 12–18 minutes, or until firm and lightly golden.
Coach tip: Oven baking gives a slightly drier exterior, which works beautifully if you plan to toast it.
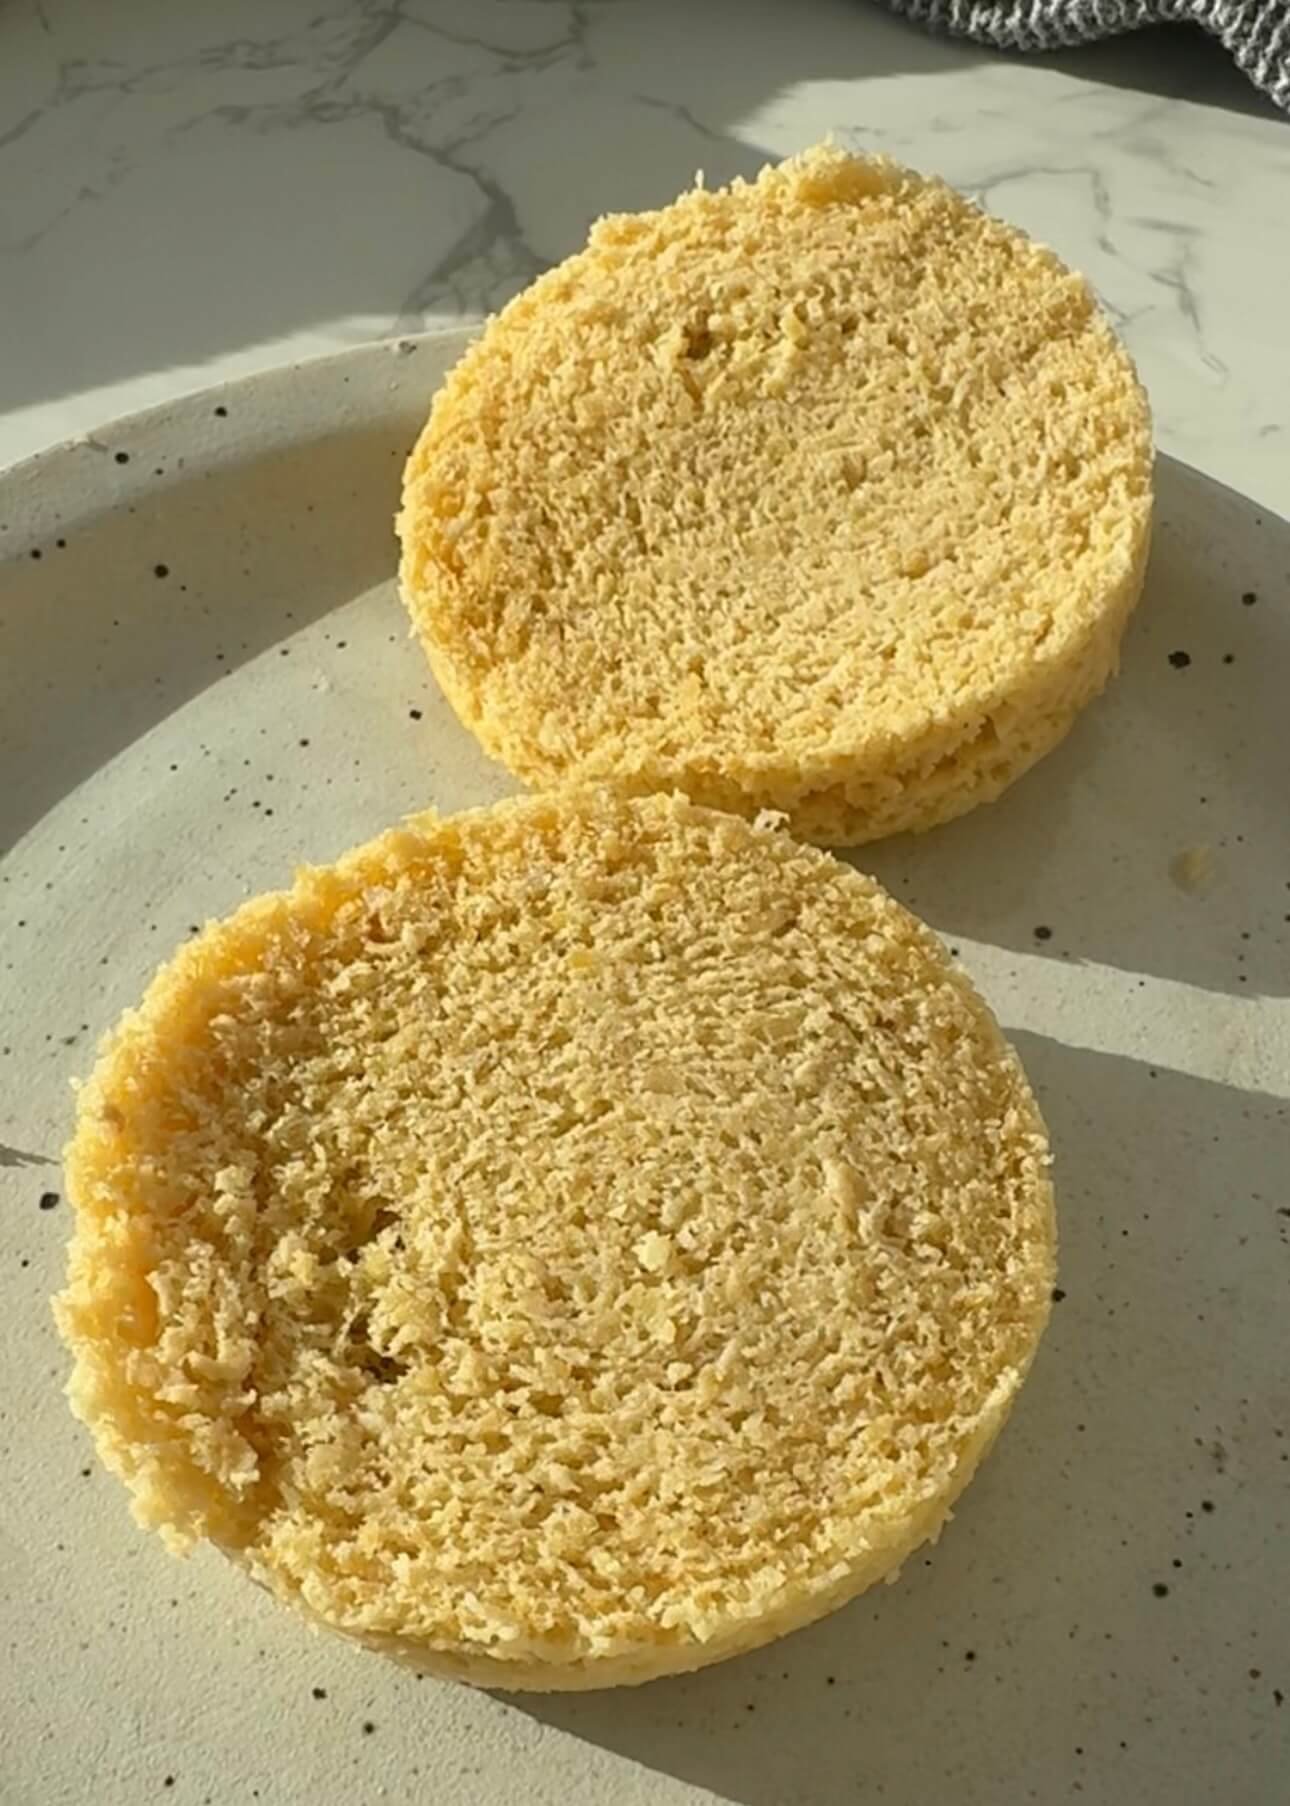
5. Cool and slice
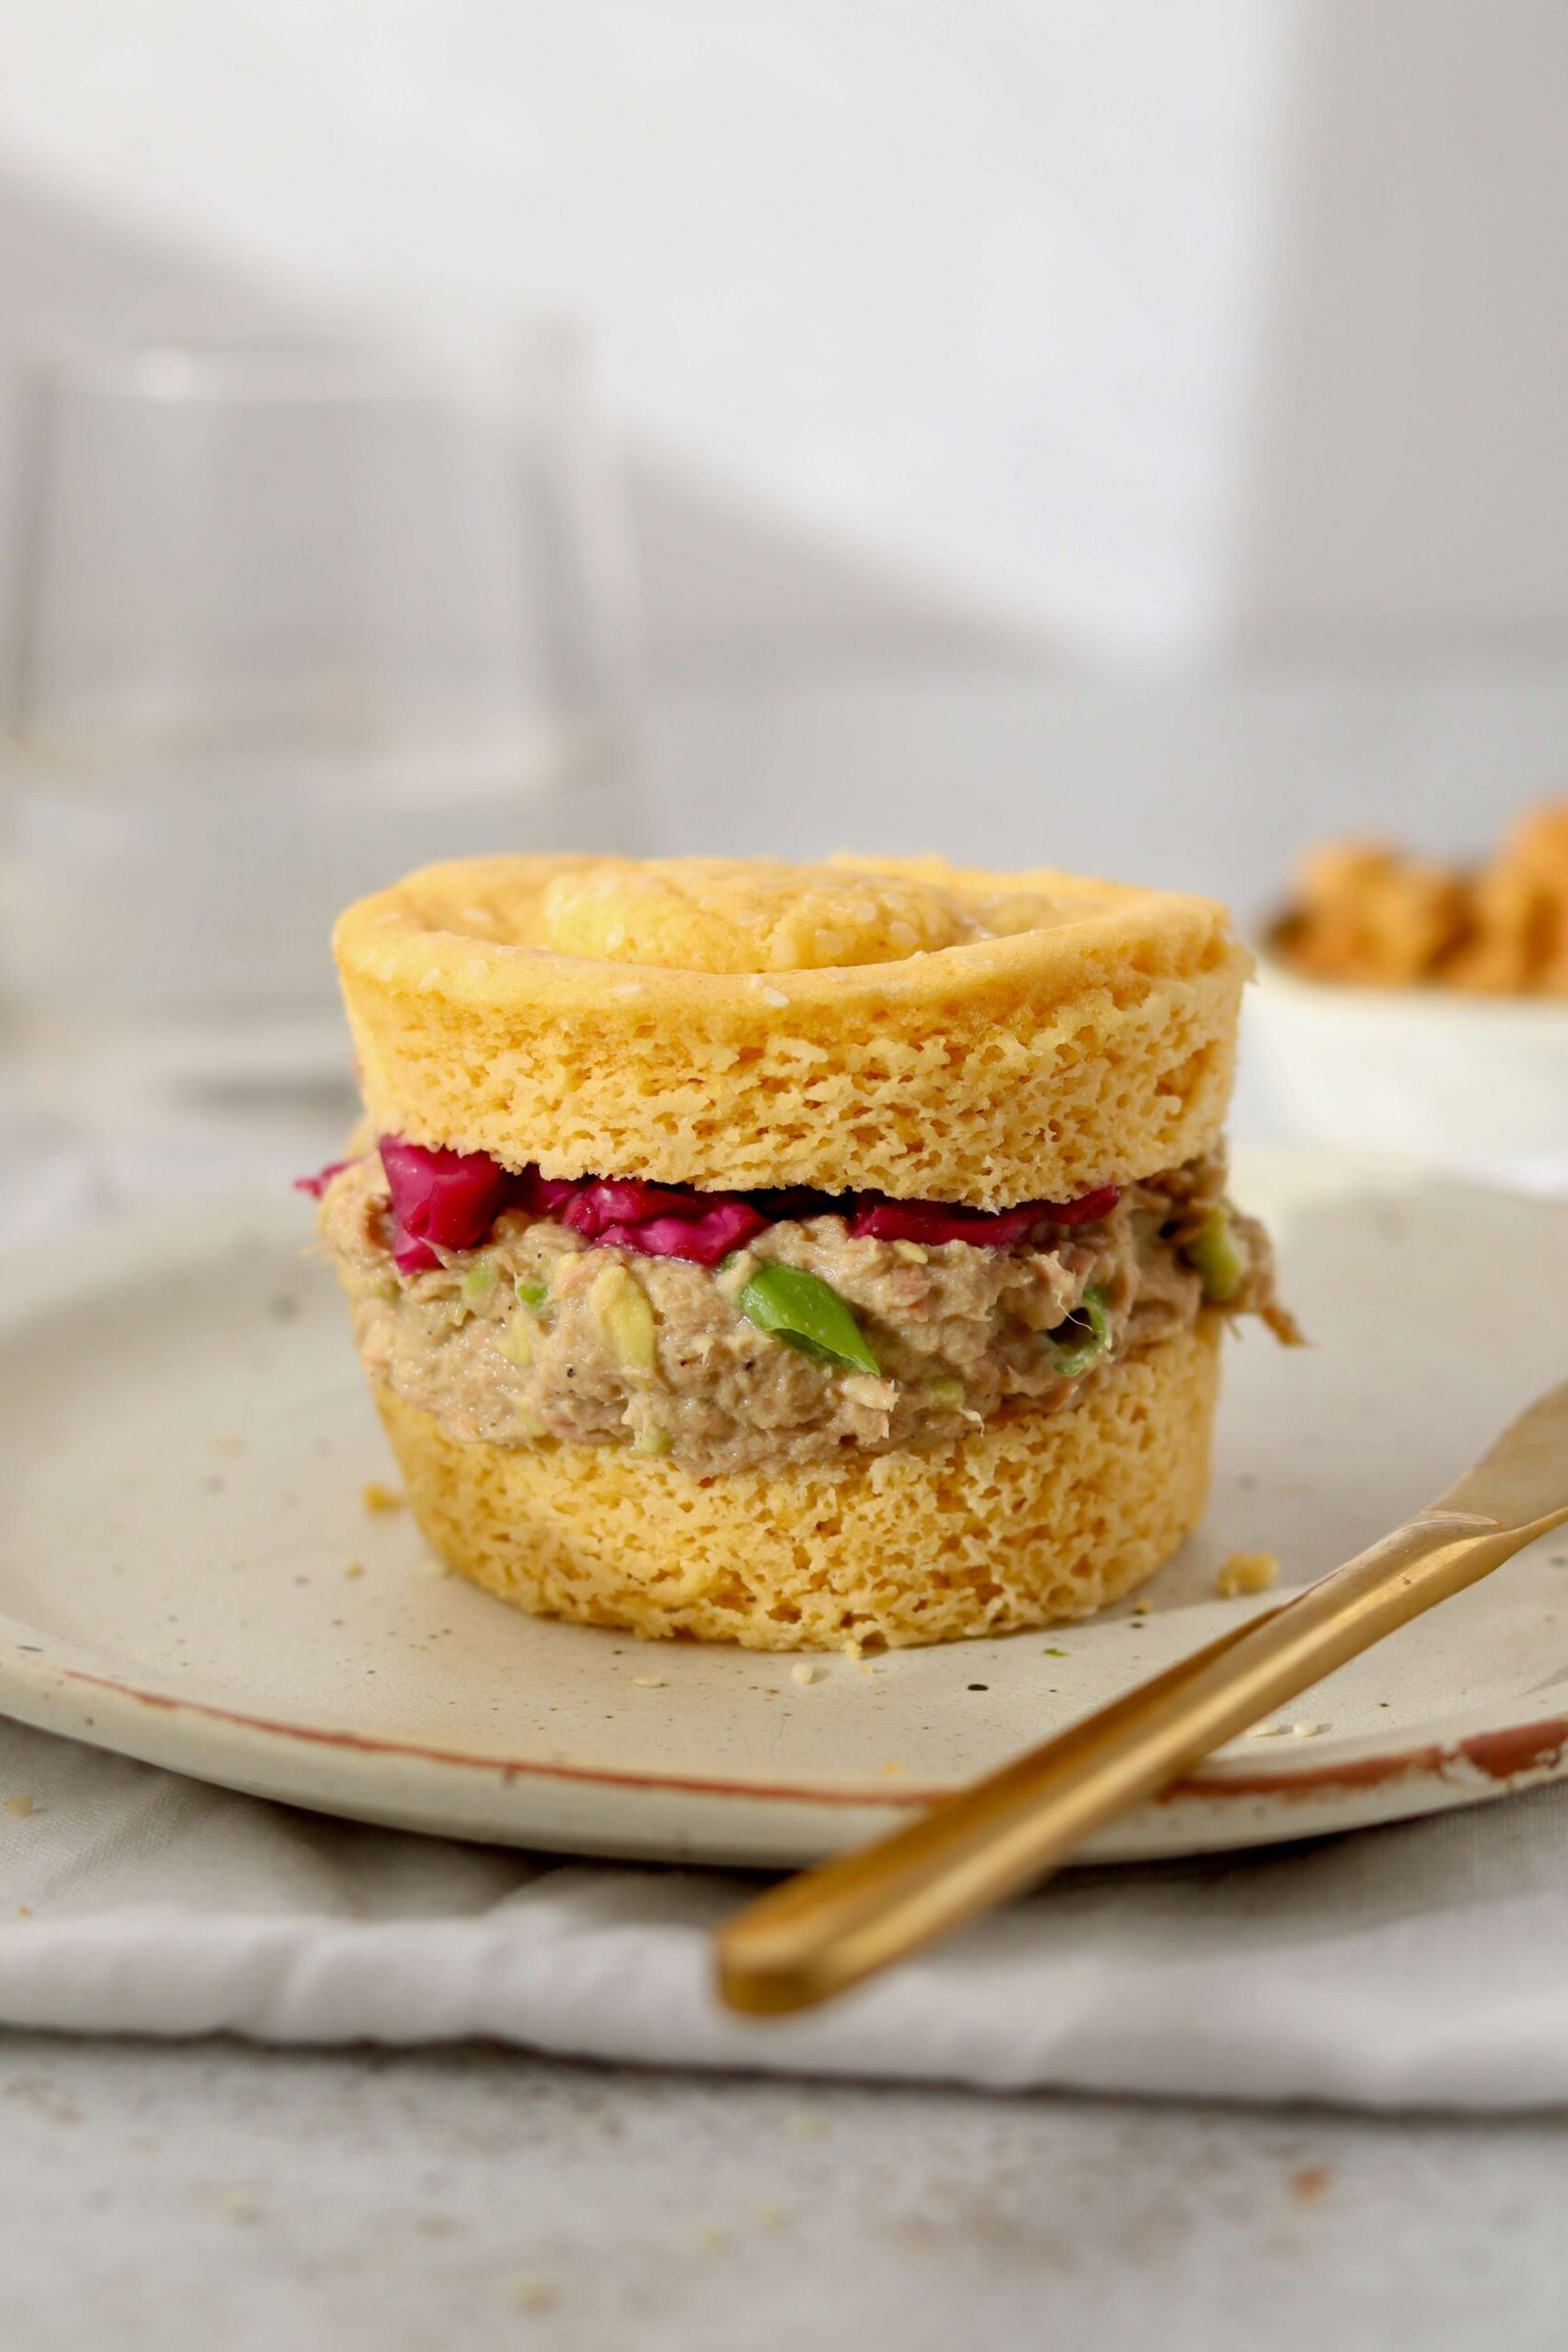
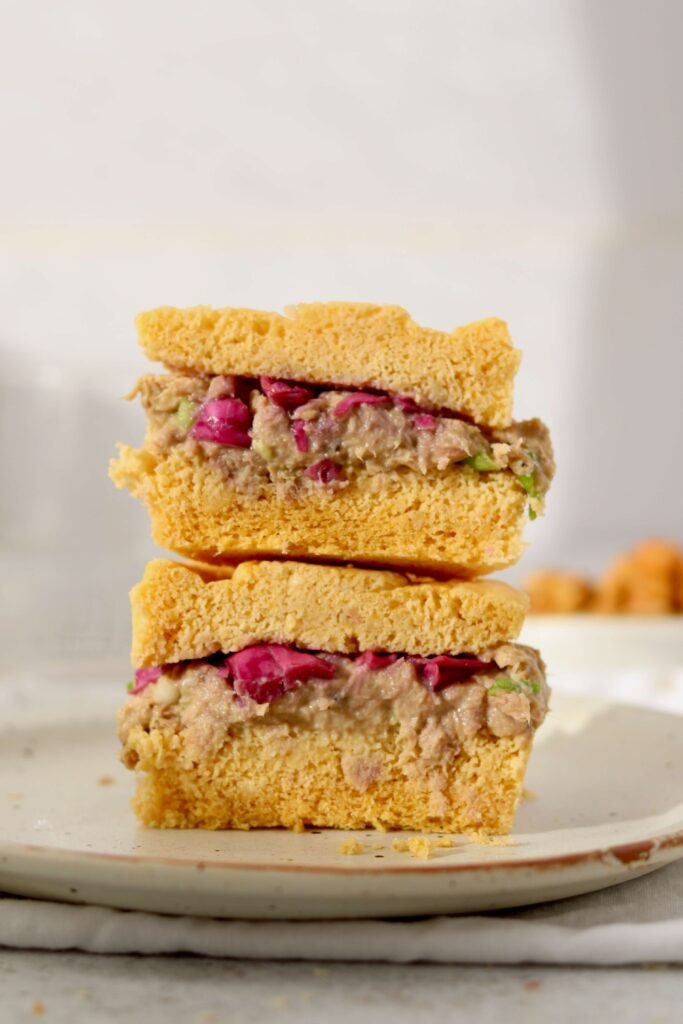
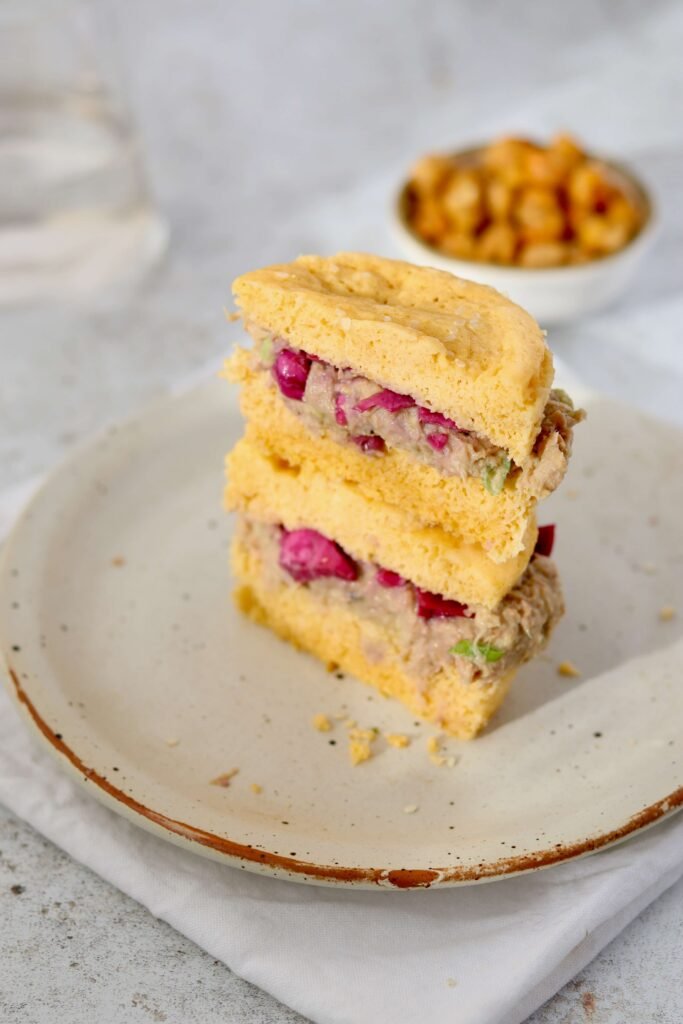
Let cool slightly, then slice in half horizontally to create a sandwich.
Cooling helps the structure set. Cutting too early can make it crumble.
Tuna–Avocado Filling
Ingredients
- 60 g tuna (in water), drained very well
- 40 g avocado (about ¼ medium)
- 2 tbsp 0% Greek yogurt
- Lemon juice, to taste
- Salt & black pepper
- Garlic powder
Optional extras:
- Pickled cabbage, drained and lightly squeezed
- Mustard
- Chili flakes
- Fresh herbs
Method
- In a bowl, mash avocado with Greek yogurt, lemon juice, salt, pepper, and garlic powder.
- Gently fold in the tuna until just combined.
- Taste and adjust seasoning.
Coach tip: Using Greek yogurt boosts protein and reduces the need for excess mayo, keeping the meal balanced and satisfying.
Assemble
- Spread the tuna–avocado mixture evenly over the bottom half of the chickpea bread.
- Add pickled cabbage for crunch and acidity.
- Close with the top half.
- Optional: Toast lightly in a pan or air fryer for extra texture.
This filling also works beautifully as a chickpea and tuna salad on its own or served over leafy greens.
Tips and Variations
- Add dried herbs or chili flakes to the batter for extra flavour.
- Turn it into a breakfast version with scrambled eggs and spinach.
- Use it as a base for avocado chickpea salad for a fully plant-based option.
- Slice and toast for a high-protein alternative to traditional toast.
- Double the recipe to meal prep for the week.
Storage, Serving and Reheating
Storage:
Store the bread in an airtight container in the fridge for up to 2 days.
Serving:
Best served fresh or lightly toasted. Pairs well with salads, soups, or as a protein-rich snack.
Reheating:
Toast in a dry pan, toaster oven, or air fryer for best texture. Avoid microwaving again, as it may become rubbery.
Final Thoughts:
If you make this chickpea bread, I’d love to know how you filled it. Did you go for the tuna version, or something completely different? Leave a comment below and share your twist. Your ideas inspire this community.
Simple ingredients, real nourishment, and recipes that support your goals. That’s what we’re here for.
Alex 🙂
The Easiest Chickpea Bread
If you’ve ever been told to avoid gluten, you’ll know the moment of panic that follows: what about bread? When I first started experimenting with gluten-free options, I wanted something simple, satisfying, and made from real ingredients. This chickpea bread quickly became a staple in my kitchen.
As a nutrition coach, I love recipes that tick multiple boxes: balanced macros, minimal ingredients, and easy prep. This gluten free chickpea bread is naturally high in protein and fibre thanks to chickpeas and egg, which means it keeps you fuller for longer and supports stable energy levels. It’s also an easy bread recipe in microwave form, perfect for busy days when you want something warm and homemade without turning on the oven.
Whether you use it for sandwiches or toast it for extra texture, this chickpea bread recipe is one you’ll come back to again and again.
Ingredients
Instructions
Blend the batter
-
Add chickpeas, egg, olive oil, baking powder, and salt to a blender or bowl. Blend until completely smooth. Coach tip: Blend thoroughly to avoid a grainy texture. A smooth batter gives you a softer crumb and better rise.

Prepare your dish
-
Pour the batter into a small microwave-safe bowl, ramekin, or mug. Smooth the top. Coach tip: Use a wider ramekin if you want a flatter, sandwich-style shape.
Microwave method
-
Microwave on high for 3 minutes, cooking in 1-minute intervals and checking each time. The bread should feel firm to the touch and pull slightly away from the edges. Coach tip: Overcooking can make it rubbery. Stop as soon as it’s set in the center.
Oven method (alternative)
-
Preheat oven to 180°C / 350°F. Bake for 12–18 minutes, or until firm and lightly golden. Coach tip: Oven baking gives a slightly drier exterior, which works beautifully if you plan to toast it.
Cool and slice
-
Let cool slightly, then slice in half horizontally to create a sandwich. Cooling helps the structure set. Cutting too early can make it crumble.
Nutrition Facts
Nutrition Facts
Servings: 1 ServingCalories:199.74kcalTotal Fat:10.52gSodium:414.82mgPotassium:147.7mgTotal Carbohydrate:16.61gDietary Fiber: 4.48gSugars: 2.96gProtein:10.35gZinc: 0.99mg
Note
- Add dried herbs or chili flakes to the batter for extra flavour.
- Turn it into a breakfast version with scrambled eggs and spinach.
- Use it as a base for avocado chickpea salad for a fully plant-based option.
- Slice and toast for a high-protein alternative to traditional toast.
- Double the recipe to meal prep for the week.
- Storage: Store the bread in an airtight container in the fridge for up to 2 days.
- Serving: Best served fresh or lightly toasted. Pairs well with salads, soups, or as a protein-rich snack.
- Reheating: Toast in a dry pan, toaster oven, or air fryer for best texture. Avoid microwaving again, as it may become rubbery.