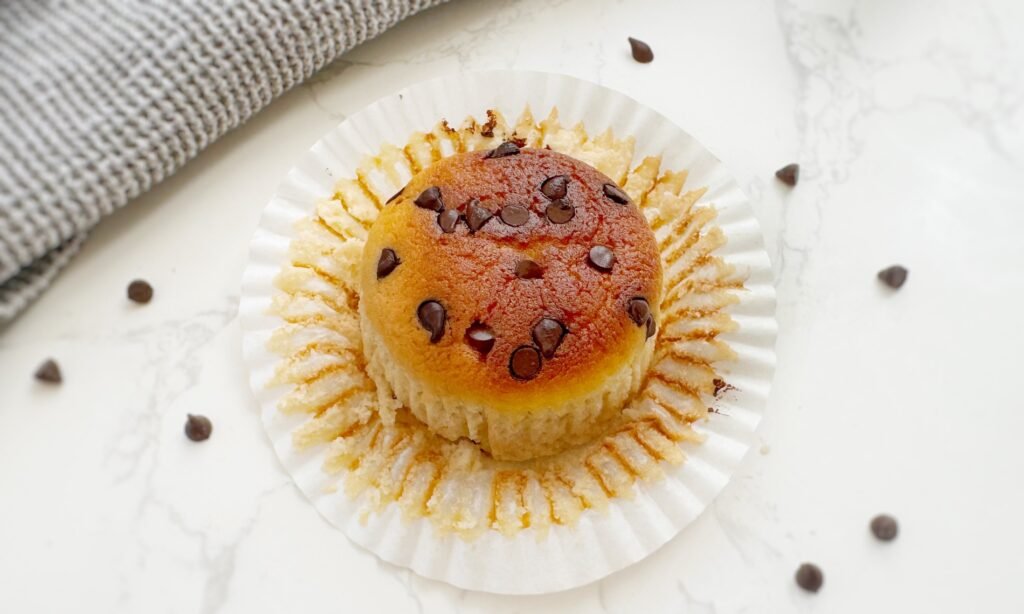
These Filo Egg Tarts are a delightful combination of crisp, golden pastry and a creamy, custard-like filling. Here’s why you’ll love this recipe:
- Quick and Easy:Made with just a few simple ingredients, these tarts come together in no time—perfect for when you’re short on time but want something special.
- Versatile:The recipe can be adapted to your preferences, with options for refined sugar-free sweetening or adding your favourite flavours.
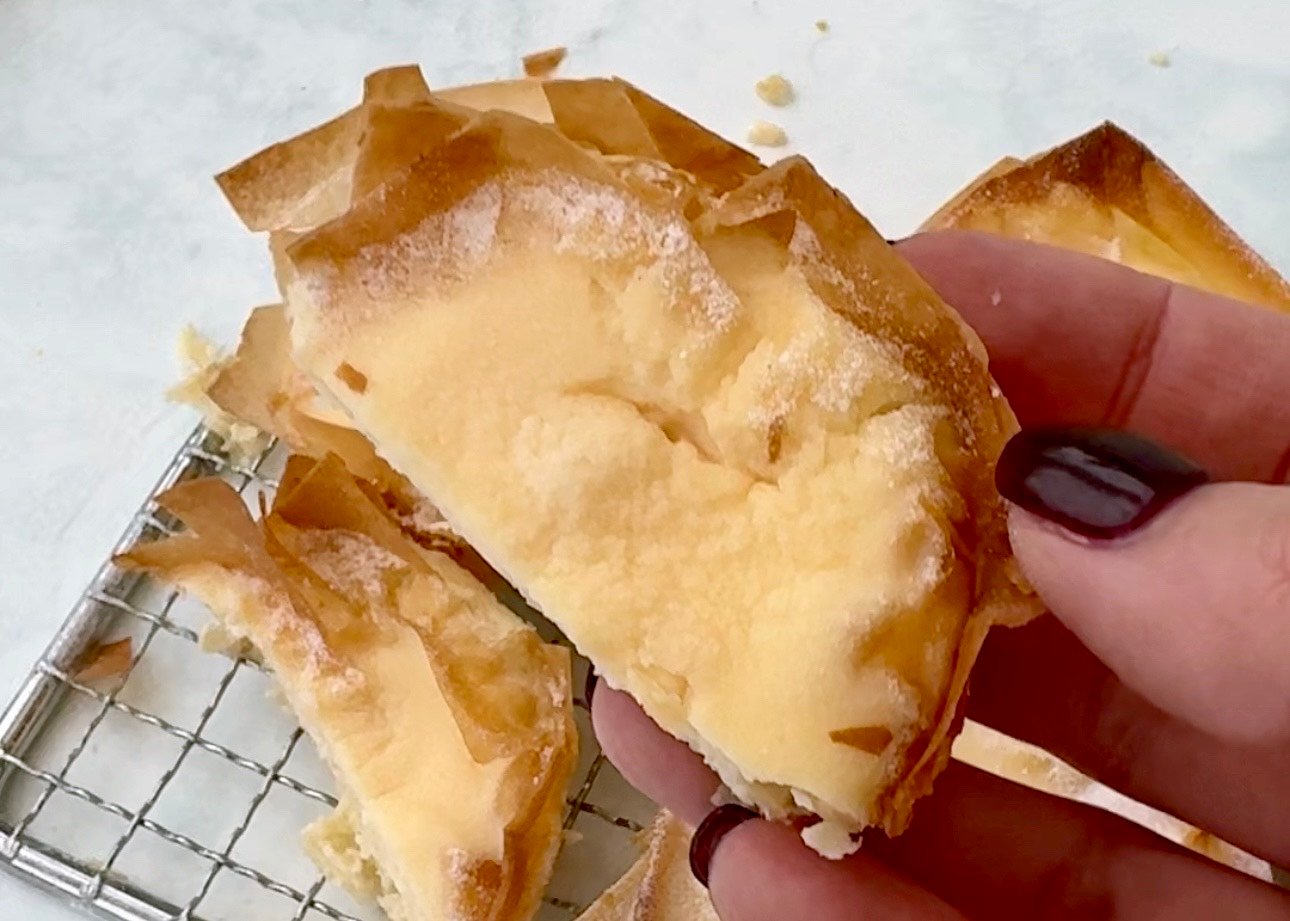
- Perfect Texture: The contrast between the flaky, crunchy filo pastry and the smooth, creamy custard filling is absolutely irresistible.
- Elegant and Impressive:Despite being so simple to make, these tarts look like they’ve come straight from a patisserie, making them ideal for entertaining or elevating any occasion.
- Healthier Option:With yoghurt and the option to use erythritol instead of icing sugar, these tarts can be a lighter indulgence.
Whether you’re hosting brunch, preparing a treat for afternoon tea, or just looking to satisfy a sweet craving, these Filo Egg Tarts are sure to become a favourite. Let’s get started!
Ingredients
For the tarts (makes 6):
- 3 eggs
- 2 tbsp yoghurt (high protein content)
- 2 tbsp icing sugar or erythritol
- 1 tsp vanilla extract
- Dash of milk (approximately 1–2 tbsp)
- 2 sheets filo pastry
- Olive oil (for brushing)
Equipment you will need to make these Filo Egg Tarts
- Muffin tin
- Pastry brush
- Mixing bowl
Method
Step 1: Prepare the Filo Pastry
- Preheat your oven to 180°C / 350°F / Gas Mark 4.
- Cut the filo pastry sheets into smaller squares or rectangles, creating 12 pieces in total.
Step 2: Assemble the Tart Shells
- Brush the cavities of a muffin tin with olive oil to ensure the tarts don’t stick.
- Layer 2 pieces of filo pastry in each cavity, gently pressing them in to create a cup shape.
- Lightly brush the pastry layers with olive oil to help them crisp up beautifully in the oven.
Step 3: Pre-Bake the Pastry
- Place the muffin tin in the preheated oven and bake the filo shells for 10 minutes, or until they start to turn golden and crispy.
Step 4: Prepare the Egg Mixture
- While the pastry shells are baking, whisk together the eggs, yoghurt, icing sugar (or erythritol), vanilla extract, and a dash of milk. Whisk until the mixture is smooth and well combined.
Step 5: Fill and Bake the Tarts
- Once the filo shells are partially baked, remove the muffin tin from the oven.
- Carefully pour the egg mixture into each pastry cup, filling them about three-quarters full.
- Place a tray of water on the bottom rack of the oven to create steam, which helps to prevent the filling from cracking.
- Return the tarts to the oven and bake for a further 15 minutes, or until the filling is set and a toothpick inserted into the centre comes out clean.
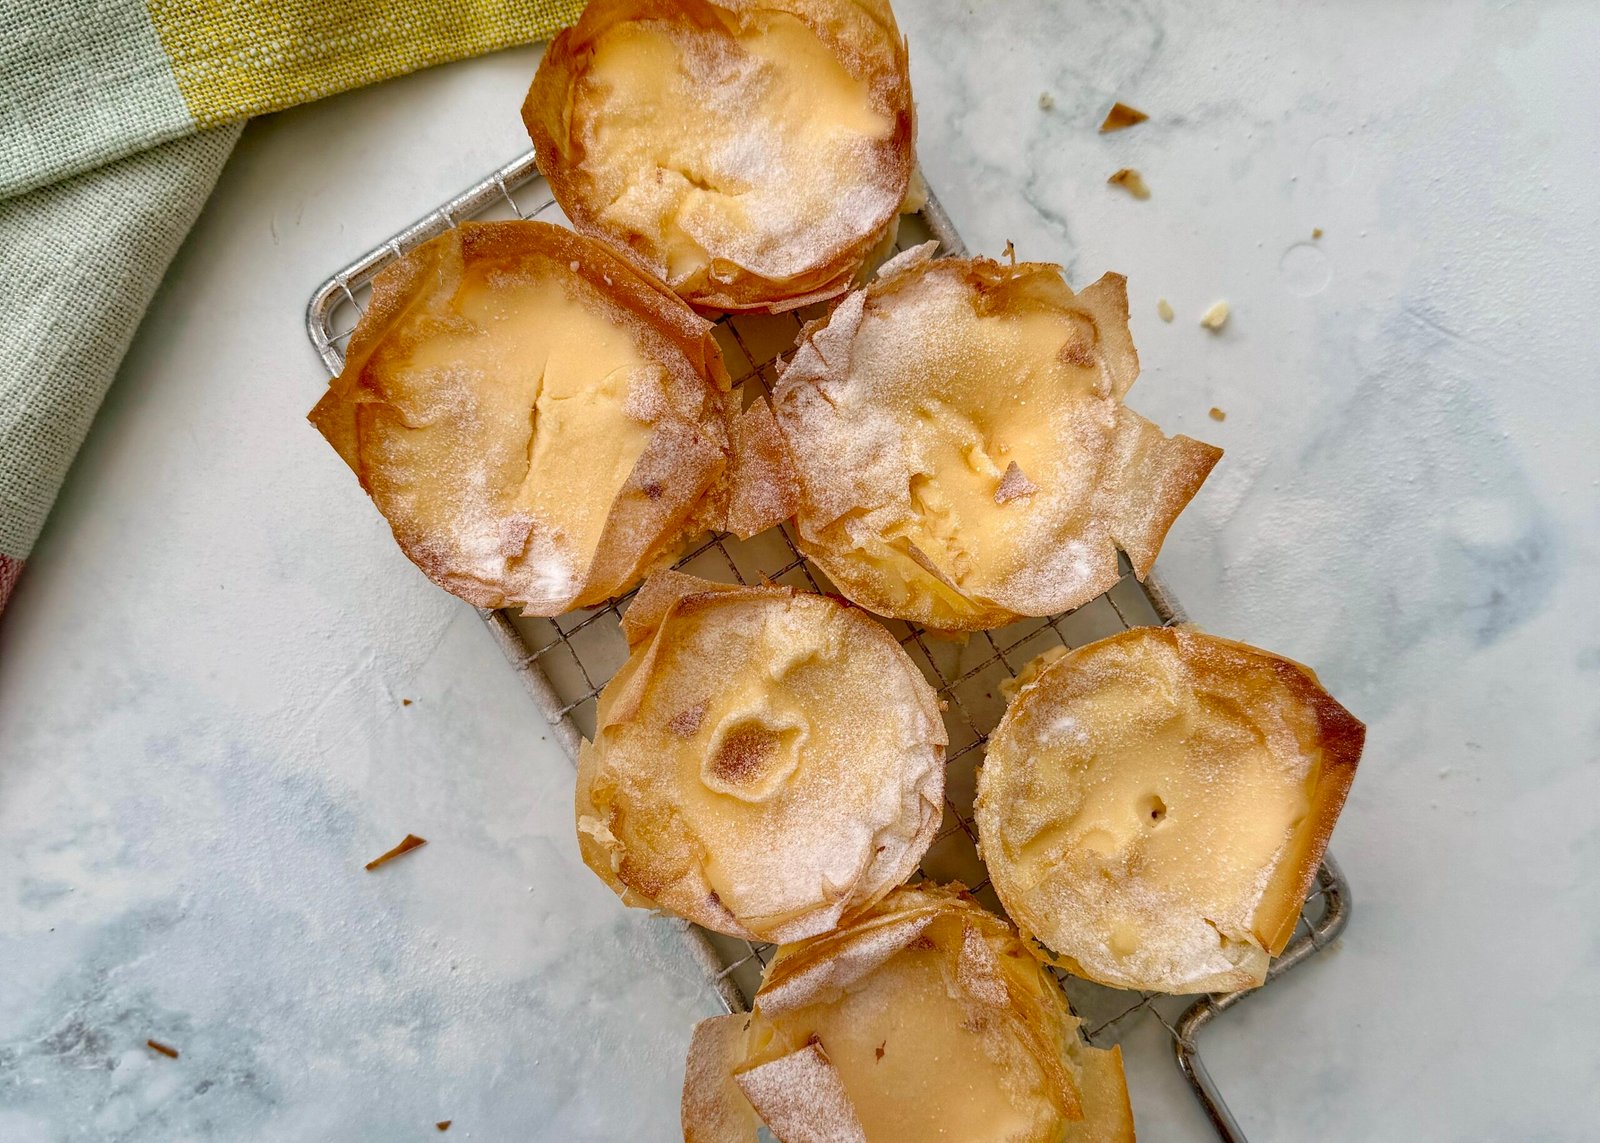
Step 6: Cool and Serve
- Remove the tarts from the oven and allow them to cool in the tin for a few minutes before transferring them to a wire rack.
- Serve warm or at room temperature. They pair wonderfully with a dusting of icing sugar or fresh fruit on the side.
Tips and Variations
- Flavour Boost: Add a sprinkle of ground cinnamon or nutmeg to the egg mixture for a touch of warmth.
- Dairy-Free Option:Substitute yoghurt with a dairy-free alternative, like coconut yoghurt.
- Sweetener Swap:Feel free to adjust the sweetness to your liking by adding more or less sugar/erythritol.
These Filo Egg Tarts are a show-stopper that taste as good as they look! Whether you’re hosting guests or simply treating yourself, they’re a surefire way to impress. Give them a go and let us know how yours turn out!
You can see this recipe on instagram: ![]()